

hth 6-way test kit instructions pdf
The HTH 6-Way Test Kit is an essential tool for accurately testing and maintaining pool water chemistry. It provides comprehensive analysis of key parameters, ensuring a safe and healthy swimming environment. Designed for simplicity and precision, this kit is a must-have for pool owners seeking reliable results and optimal water conditions.
Overview of the HTH 6-Way Test Kit
The HTH 6-Way Test Kit is a comprehensive and user-friendly tool designed to monitor six critical parameters in pool water: pH, total chlorine, total alkalinity, cyanuric acid, calcium hardness, and total bromine. This kit ensures accurate and reliable results, helping pool owners maintain optimal water chemistry. It includes test strips and reagents, making it easy to collect and analyze samples. The kit is essential for ensuring a safe and healthy swimming environment, as imbalanced water chemistry can lead to discomfort for swimmers and damage to pool equipment. Regular testing with the HTH 6-Way Test Kit promotes consistent water quality and extends the lifespan of your pool.
Importance of Regular Pool Water Testing
Regular pool water testing is crucial for maintaining a safe, clean, and healthy swimming environment. Imbalanced water chemistry can lead to discomfort for swimmers, such as eye irritation or skin rashes, and damage to pool equipment. Testing ensures proper levels of disinfectants, preventing bacteria and algae growth. It also helps maintain clarity and prevents scaling or corrosion caused by improper pH, alkalinity, or calcium hardness levels. Consistent testing with tools like the HTH 6-Way Test Kit allows pool owners to address issues promptly, ensuring optimal water quality and extending the lifespan of pool equipment. Regular monitoring is essential for a trouble-free and enjoyable swimming experience.
Key Components of the HTH 6-Way Test Kit
The HTH 6-Way Test Kit includes test strips, reagents, and a color chart for accurate pool water analysis. It tests pH, Total Chlorine, Total Alkalinity, Cyanuric Acid, Calcium Hardness, and Total Bromine levels.
Parameters Tested: pH, Total Chlorine, Total Alkalinity, Cyanuric Acid, Calcium Hardness, and Total Bromine
The HTH 6-Way Test Kit evaluates six critical pool water parameters: pH, Total Chlorine, Total Alkalinity, Cyanuric Acid, Calcium Hardness, and Total Bromine. pH measures water acidity, essential for swimmer comfort and sanitizer effectiveness. Total Chlorine checks the level of active sanitizer, crucial for water disinfection. Total Alkalinity stabilizes pH levels, preventing fluctuations. Cyanuric Acid protects chlorine from sunlight degradation. Calcium Hardness prevents pool surface damage; Total Bromine ensures proper disinfection in bromine-based systems. Accurate testing of these parameters ensures balanced water chemistry, optimizing pool safety and efficiency.
Test Strips and Reagents Included in the Kit
The HTH 6-Way Test Kit includes test strips and reagents designed for precise water analysis. The kit contains test strips for quick, dip-and-read results, along with dropper bottles for reagent-based testing. Each parameter has specific test materials, ensuring accurate measurements. The test strips are color-coded for easy comparison with the provided chart. Reagents are carefully formulated to react with water samples, delivering clear, reliable results. Additional accessories like vials and caps are included for proper sample collection and testing. These components work together to provide a comprehensive and user-friendly testing experience, making it easy to monitor and maintain optimal pool water chemistry. The kit is designed for accuracy and convenience, ensuring reliable results every time.

Step-by-Step Instructions for Using the HTH 6-Way Test Kit
Collect a water sample, prepare test strips or vials, add the sample, wait for reactions, and read results to ensure accurate pool water testing and adjustments.
Collecting the Water Sample
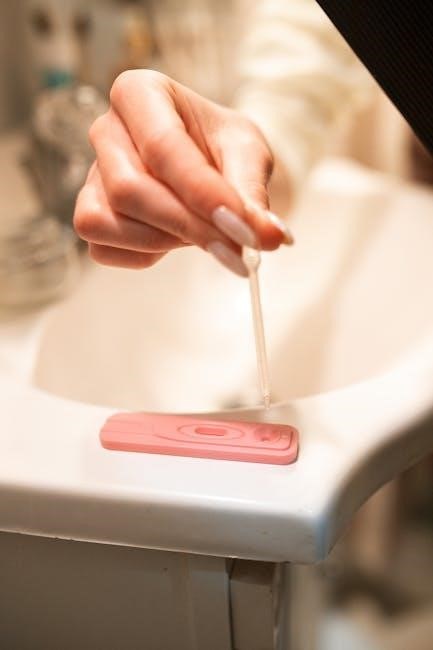
To begin, collect a water sample from your pool. Dip the test strip to a depth of 15cm for 2 seconds, then shake once to remove excess water. Hold the strip upright and compare immediately with the color chart. For vials, rinse and fill to the 10ml mark with pool water taken at elbow level below the surface. Avoid contamination by skimming floatables. Ensure the sample is taken from at least 18 inches deep to represent the water accurately. This step is crucial for obtaining reliable test results. Always follow the kit’s specific guidelines for sample collection to ensure accuracy and consistency in testing.
Preparing the Test Strips or Vials
Before testing, prepare your test strips or vials according to the kit’s instructions. For test strips, remove one strip from the bottle and dip it into the water sample to a depth of 15cm for 2 seconds. Shake the strip once to remove excess water. For vials, rinse the vial with pool water, then fill it to the 10ml mark using the provided sampler. Ensure no contamination occurs and avoid touching the test pad on the strip or the inside of the vial. Proper preparation is essential for accurate results. Always follow the kit’s specific guidelines for preparing test strips or vials to maintain consistency and reliability in your pool water testing routine.
Adding the Water Sample to the Test Vials
Once the vials are prepared, carefully pour the collected pool water sample into each test vial up to the 10ml mark using the provided sampler. Ensure the vial is clean and free from contamination. For test strips, dip the strip into the water sample to a depth of 15cm for 2 seconds, then shake once to remove excess water. For vials requiring reagents, add the specified number of drops to the water sample and mix gently by swirling the vial. Avoid touching the test pad on the strip or the inside of the vial with your fingers to prevent inaccurate results. Properly adding the water sample ensures reliable test outcomes;

Waiting for the Reaction and Reading Results
After adding the water sample and any required reagents, wait for the specified reaction time, usually 15-30 seconds, to allow the chemicals to interact. For test strips, hold the strip upright and observe the color changes on the pads. Compare these colors to the provided chart to determine the parameter levels. For vials, watch for color changes or precipitates, then match the results to the corresponding numeric values. Ensure accurate comparisons by using the chart immediately, as colors may fade over time. Document the readings for each parameter to track changes and guide necessary adjustments. This step is crucial for ensuring precise and actionable test outcomes. Always follow the kit’s timing instructions for reliable results.

Interpreting Test Results
Interpreting test results involves comparing readings against ideal ranges to ensure pool water safety and efficiency. Accurate interpretation maintains optimal conditions, preventing issues and ensuring a safe, enjoyable swimming environment.
Understanding the Color Chart and Numeric Values
The HTH 6-Way Test Kit includes a color chart to help interpret results. Each parameter has a specific range, with corresponding colors and numeric values. Compare the test strip color to the chart to determine if levels are within the ideal range. For example, pH should be between 7.2 and 7.8, while total chlorine should be 1-3 ppm. Numeric values provide precise measurements, ensuring accuracy. If readings fall outside the recommended range, adjustments are necessary. Regularly reviewing the color chart and numeric data helps maintain balanced pool water chemistry, preventing issues like eye irritation or equipment damage. Always refer to the chart immediately after testing for the most accurate comparison.
Identifying Imbalances in Pool Water Chemistry
Imbalances in pool water chemistry can lead to issues like eye irritation, cloudy water, or equipment damage. The HTH 6-Way Test Kit helps detect these imbalances by measuring key parameters. Low pH levels can cause corrosion, while high pH can reduce chlorine effectiveness. Imbalanced total alkalinity may lead to unstable pH levels, while low cyanuric acid can reduce chlorine’s stability in sunlight. High calcium hardness can cause scaling, and improper total bromine or chlorine levels can affect sanitation. By comparing test results to the recommended ranges, you can identify and address these issues promptly, ensuring a safe and enjoyable swimming environment. Regular testing is crucial for maintaining optimal water conditions. Always adjust chemicals as needed to restore balance.
Adjusting Pool Chemicals Based on Test Results
After identifying imbalances, adjust chemicals to restore optimal levels. Use the HTH 6-Way Test Kit guide to determine the correct amounts of pH balancers, chlorine, or stabilizers needed. Always follow the recommended instructions for each parameter to ensure safe and effective pool water chemistry. Regular adjustments maintain a healthy swimming environment.
Recommended Chemical Adjustments for Each Parameter
To maintain balanced pool water chemistry, adjust chemicals based on test results. For pH levels, add pH increaser or decreaser as needed. If total chlorine is low, add chlorine tablets or granules. Adjust total alkalinity by adding alkalinity increaser to stabilize pH levels. For cyanuric acid, add stabilizer if levels are low to protect chlorine from sunlight. If calcium hardness is low, add calcium chloride to prevent equipment damage. Finally, adjust total bromine by adding bromine tablets if levels are insufficient. Always follow the HTH 6-Way Test Kit guidelines for precise dosing to ensure safe and effective pool water chemistry. Regular adjustments will maintain a clean and healthy swimming environment.

Maintenance and Storage of the Test Kit
Store the HTH 6-Way Test Kit in a cool, dry place away from direct sunlight and chemicals. Clean test vials regularly and handle reagents with care to ensure accuracy and longevity.
Proper Storage Conditions for the Test Kit
Store the HTH 6-Way Test Kit in a cool, dry place away from direct sunlight and chemicals. Keep it out of reach of children and pets. Avoid exposure to moisture and humidity, and maintain a consistent temperature between 50°F and 86°F (10°C and 30°C). Do not store in areas with extreme heat, cold, or humidity. Ensure the kit is tightly sealed when not in use to prevent contamination. Regularly check expiration dates of test strips and reagents. Proper storage ensures accurate test results and extends the kit’s longevity. Always refer to the manufacturer’s guidelines for specific storage recommendations.
Cleaning and Maintaining Test Vials and Equipment
Regularly clean and maintain test vials and equipment to ensure accurate results. Rinse vials with distilled water after each use and dry thoroughly with a soft cloth. Avoid using abrasive materials or chemical cleaners, as they may leave residues. Store vials in a protective case to prevent scratches and contamination. Replace any damaged or cloudy vials immediately. For dropper bottles, ensure tight seals to prevent contamination and evaporation. Clean any equipment with a mild soap solution and rinse thoroughly. Proper maintenance extends the life of your test kit and ensures reliable testing outcomes. Follow the manufacturer’s guidelines for specific cleaning instructions to maintain optimal performance.